Installing a radiator might seem like a daunting DIY project, but with the right tools, preparation, and guidance, you can do it safely and effectively without hiring a professional. This step-by-step guide breaks down the process of how to install a radiator in your home, helping you save money, boost heating efficiency, and gain hands-on experience.
Installing a new radiator is one of the most practical home improvements you can undertake to improve your comfort and heating efficiency. Whether you’re upgrading an outdated system, adding a radiator to a new room, or simply replacing a faulty unit, understanding how to install a radiator yourself can save you significant costs. With a bit of planning, the right tools, and careful attention to detail, it’s a manageable DIY project for most homeowners.
Preparing for Installation: Tools and Safety First
Before you begin, gather all the essential tools and equipment to make the process smooth and safe. Here’s what you’ll need:
- Adjustable spanner
- Pipe cutter
- Radiator brackets and screws
- Drill and spirit level
- PTFE tape
- Radiator valves
- Measuring tape
- Bucket or towels for catching water
Safety is paramount. Always switch off your central heating system and allow it to cool completely before starting. If you’re replacing an old radiator, wear gloves and be prepared for potential water spillage.
Step 1: Drain the Central Heating System
The first step in how to install a radiator is to drain your heating system to prevent leaks and make the installation safe.
- Turn off the heating and allow the system to cool.
- Locate the drain valve (usually at the lowest point of the system).
- Connect a hose or place a bucket underneath and open the valve.
- Loosen the bleed valves on your radiators to speed up drainage.
Once the system is empty, you can safely remove the old radiator or prepare the space for a new one.
Step 2: Mark and Install Radiator Brackets
Accurate measurements are crucial for a secure and level installation. Use a spirit level and tape measure to mark the position of the new radiator on the wall. Ensure it’s high enough from the floor (typically around 10–15 cm) to allow for proper heat circulation.
- Mark the bracket positions according to the radiator’s size.
- Drill holes and insert wall plugs.
- Secure the brackets firmly to the wall.
This step sets the foundation for a stable and well-aligned installation.
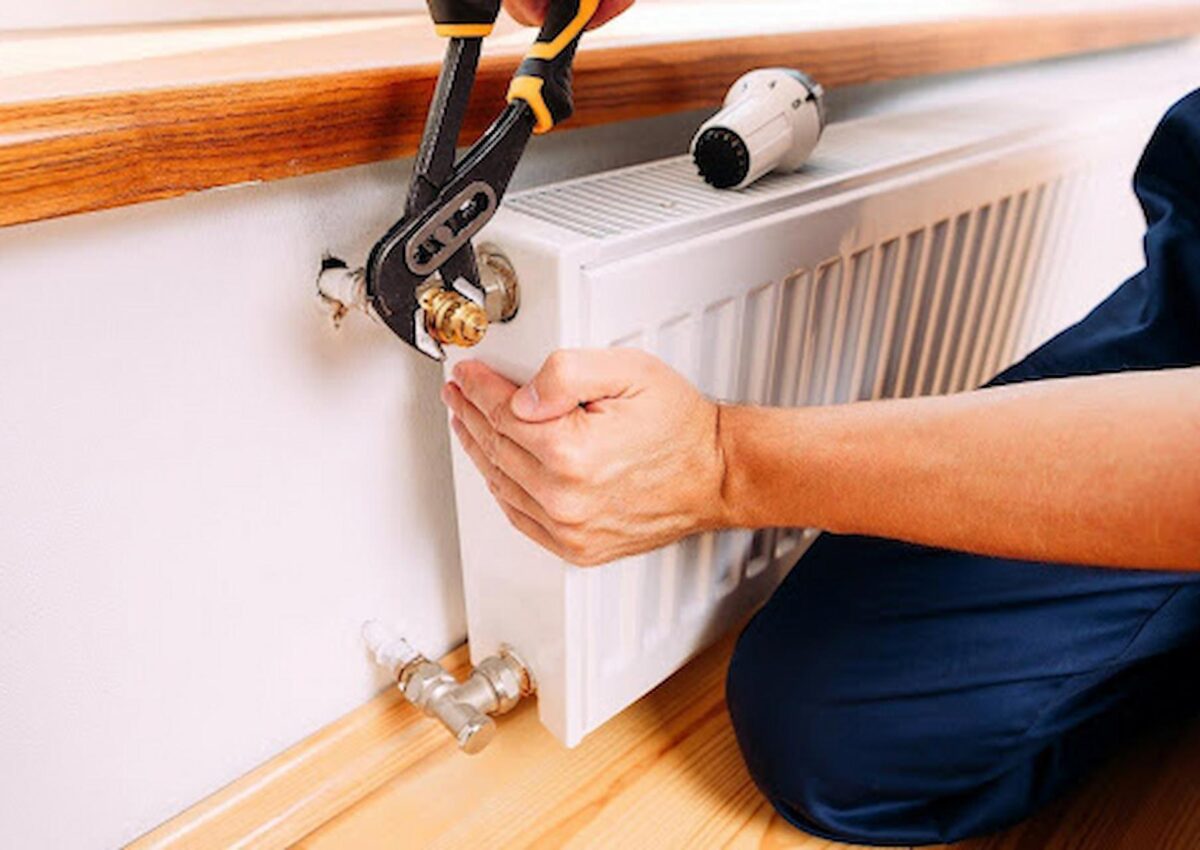
Step 3: Position and Connect the Radiator
With the brackets installed, lift the radiator carefully and hang it securely. This part of how to install a radiator requires precision and patience.
- Fit the radiator onto the brackets, ensuring it’s level.
- Wrap PTFE tape around the threads of the radiator valves to prevent leaks.
- Connect the valves to the existing pipework. Tighten them gently with an adjustable spanner, being careful not to overtighten.
If you’re replacing an older radiator, this might be a good time to upgrade to thermostatic radiator valves (TRVs), which allow better temperature control and energy efficiency.
Step 4: Refill and Bleed the System
Once everything is connected, it’s time to refill your heating system and remove any trapped air.
- Close all drain valves.
- Refill the system slowly, monitoring for any leaks around the valves.
- Use a radiator key to open the bleed valve at the top of the radiator.
- Let trapped air escape until water flows steadily, then close the valve.
Bleeding ensures your radiator operates efficiently and distributes heat evenly throughout your space.
Step 5: Test and Inspect
The final stage of how to install a radiator is testing your work. Turn your heating system back on and check that:
- The radiator heats up evenly from top to bottom.
- There are no leaks at the valves or connections.
- The unit is securely mounted and stable.
If you notice cold spots or hear gurgling noises, bleed the radiator again to release any remaining air.
Tips for a Successful Installation
- Check compatibility: Ensure your new radiator’s size and output match the room’s heating needs.
- Use quality materials: Invest in durable valves and fittings to avoid future leaks.
- Seek help for complex systems: If your home uses a pressurised or sealed system, professional installation may be safer.
- Regular maintenance: Bleed and inspect your radiator annually to maintain efficiency.
Final Thoughts: DIY Confidence and Warmth
Learning how to install a radiator empowers homeowners to take control of their home heating and save on installation costs. With careful planning, proper tools, and step-by-step execution, even beginners can complete this project confidently. Not only does a well-installed radiator improve comfort and efficiency, but it also adds long-term value to your property. So, grab your tools, follow this guide, and enjoy a warmer, more energy-efficient home.